
- Check your router: is GEYRA right for me?
- Free or Guardian? What does GEYRA cost?
- Book Guardian
- Round-the-clock protection: defence even while the PC is off
- Alarm phone: sound, “Do not disturb” and full screen
- Paying with Link (Stripe)
- Enter the Guardian code (“I have already paid”)
- Receipt, invoice and bank statement “LINK.COM* GEYRA”
- Windows warning “Windows protected your PC”
- Install GEYRA
- Download GEYRA for free
- New PC: set up GEYRA again
- Remove / uninstall GEYRA
- First start: GEYRA ID and registration
- Recovery key: what is it for and where to keep it?
- First setup and first scan
- Understanding the overview
- Confirm and name devices
- Connect router
- Router password is not accepted
- Pair alarm phone
- Test the alarm
- Change or remove phone
- Block a device
- Allow a device / lift quarantine
- Protection levels OBSERVE, PROTECT, GUARDIAN
- Guardian rules and many alarms when switching on
- Quarantine for new devices
- Updates
- Troubleshooting
- Cancel the Guardian subscription
- Have your data deleted
- Nothing found – info@geyra.de
From installation
to a protected home network.
What happens at the first start and how to find your way around GEYRA.
the network itself carries GEYRA.
Registration at the first start
At the very first start GEYRA registers your household automatically. You don't need to enter anything – no code and no email address.
Welcome and GEYRA ID
GEYRA welcomes you and shows your GEYRA ID (for example GEYRA-000123). It stands for your household. Later you'll find it in GEYRA under Protection & system.
Save the recovery key
Right after that GEYRA shows you your recovery key – more about this in the next section.
GEYRA already runs at my home
Second PC in the same household? On the PC that is set up click Protection & system on the left and then ADD ANOTHER DEVICE. On the new PC choose GEYRA already runs at my home and enter the device code.
Restore
No GEYRA device left, for example after getting a new PC? Choose Restore and enter your GEYRA ID and your recovery key. Your household with all devices, names and your alarm phone is then back.
The recovery key
Right after registration GEYRA shows you a recovery key once (GEYRA-RK-…).
What is the key for?
With the key and your GEYRA ID you get your GEYRA household back if you ever have no GEYRA device left – for example with a new PC or if the old PC is broken. Your devices, names and alarm phone are then kept.
Where to keep it?
Best: PRINT it and put it with your important documents, together with your GEYRA ID.
Or: write it down and keep it safe, or use COPY to paste it into a password manager.
Save the key
Click PRINT (recommended) or COPY.
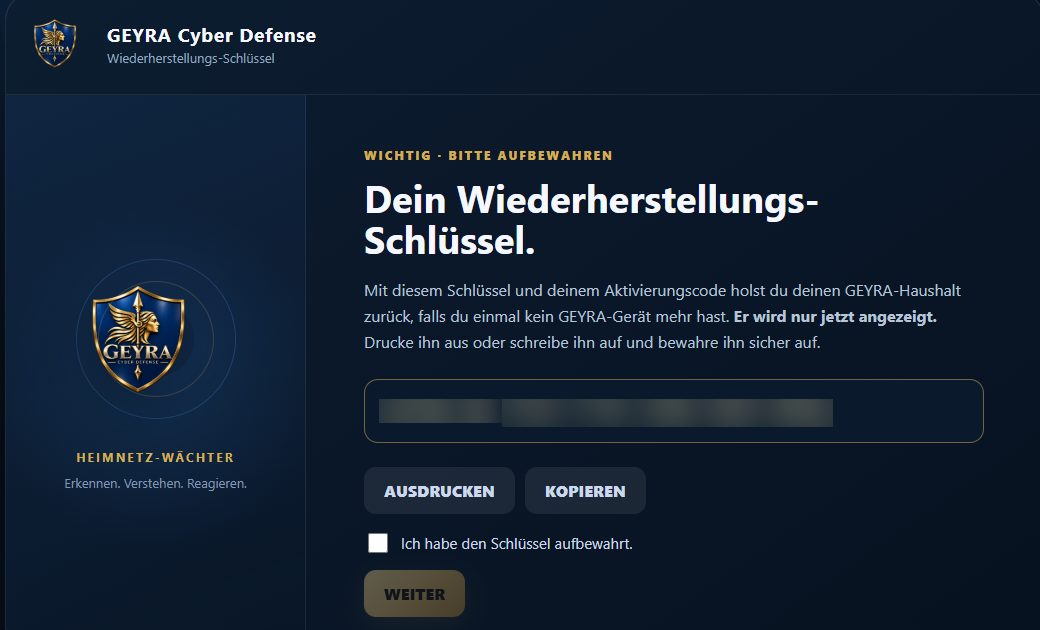
The recovery key (made unreadable in the picture). Confirm
Tick “I have kept the key.” and click NEXT.
The first setup
After registration GEYRA guides you through everything important in six steps. You can skip each step with Later and catch up on it in the overview.
Welcome
GEYRA shows what comes next: check home network, connect router, pair alarm phone, switch on protection. It takes about five minutes. Click Next.
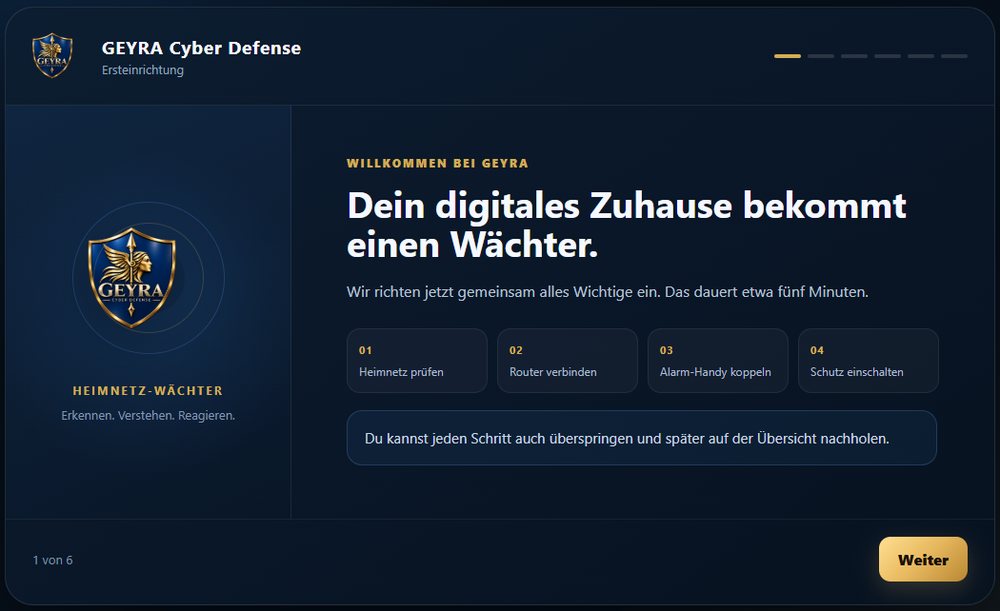
Welcome – the four steps at a glance. Check home network
Click SCAN HOME NETWORK NOW. GEYRA looks for all devices and remembers this normal state. Afterwards it shows how many devices were found, and Next becomes available.
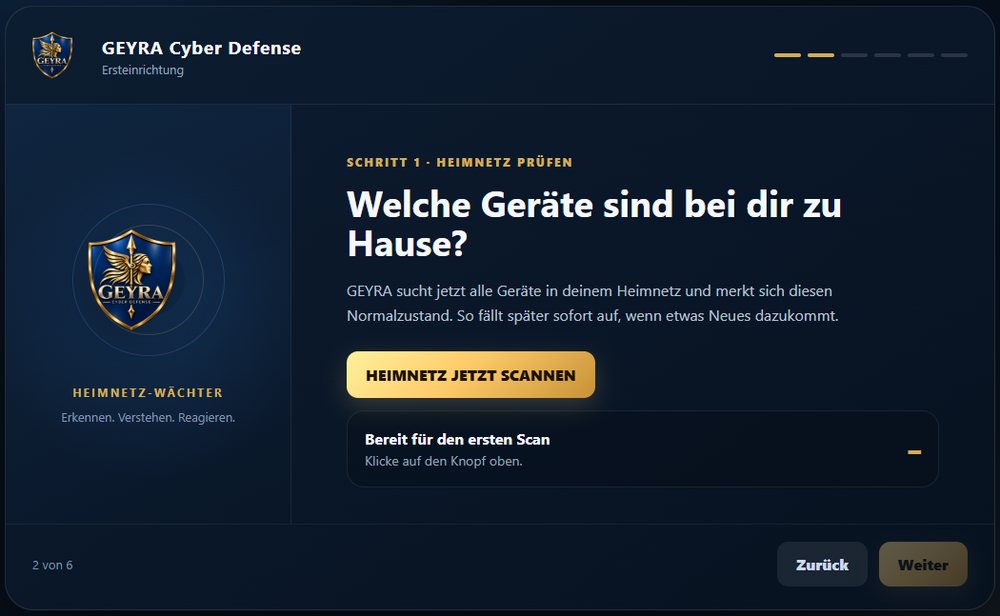
Step 1: check home network. Connect router
Click CONNECT ROUTER NOW. Have the router password ready – for a FRITZ!Box the password of the FRITZ!Box, not the Wi-Fi password. If you never changed it, it is on the sticker. Round-the-clock protection later needs your own password – best change it right away (see Round-the-clock protection).
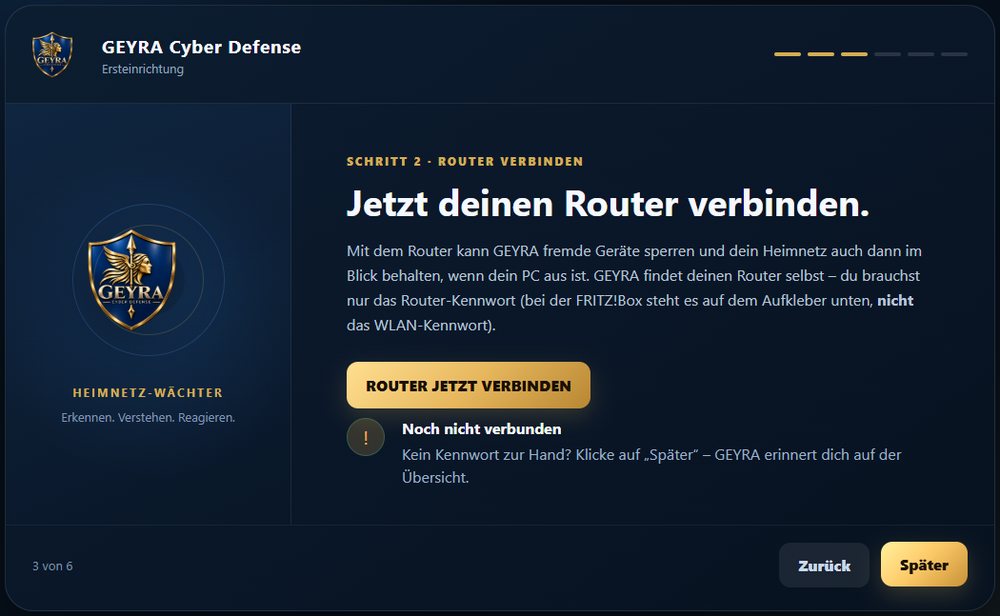
Step 2: connect router. After logging in, GEYRA shows what will be set up on the router. Nothing is changed until you click SET UP ON ROUTER.
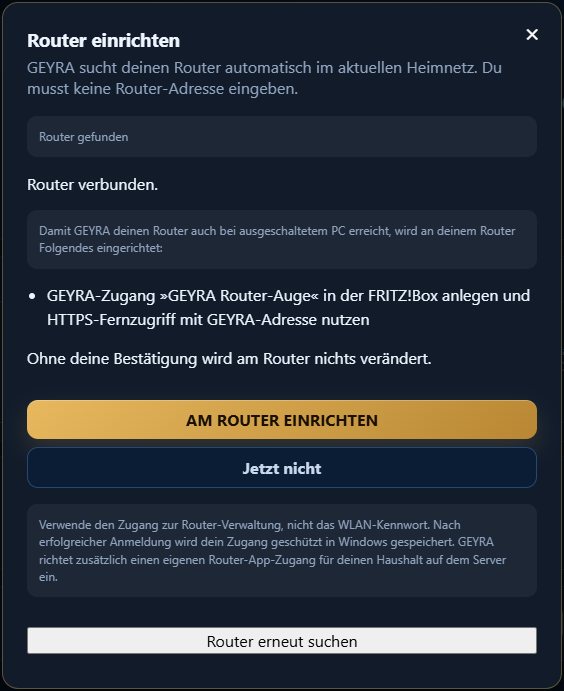
Nothing is changed on the router without your confirmation. Afterwards the setup returns and shows ✓ Router connected. More: Connect router.
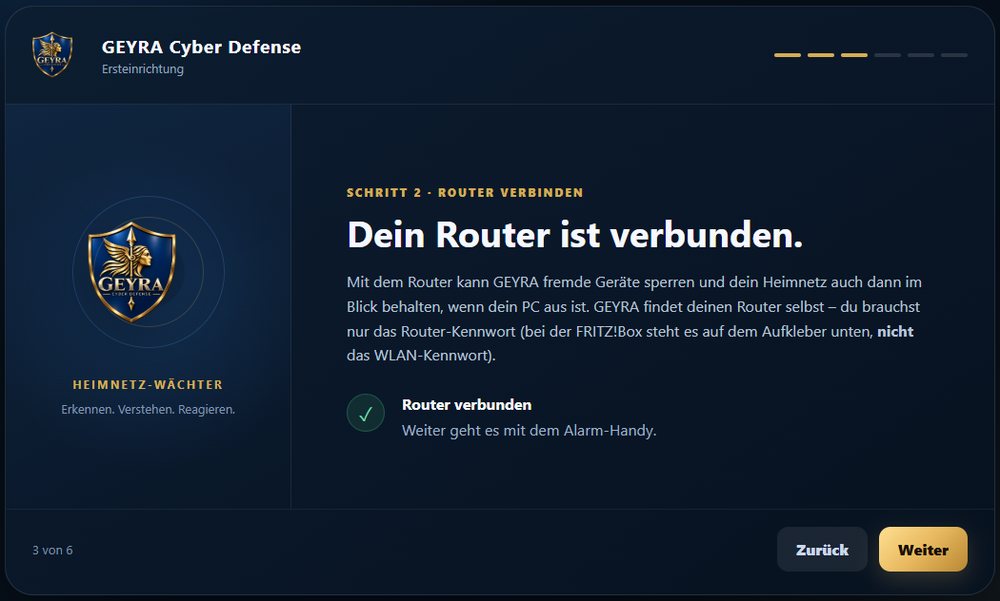
The router is connected. Pair alarm phone
On the smartphone, install the app “GEYRA Cyber Defense” from the Google Play Store. Then click PAIR ALARM PHONE NOW and follow the window. A spinner shows while GEYRA waits for your phone. Step by step: Pair alarm phone.
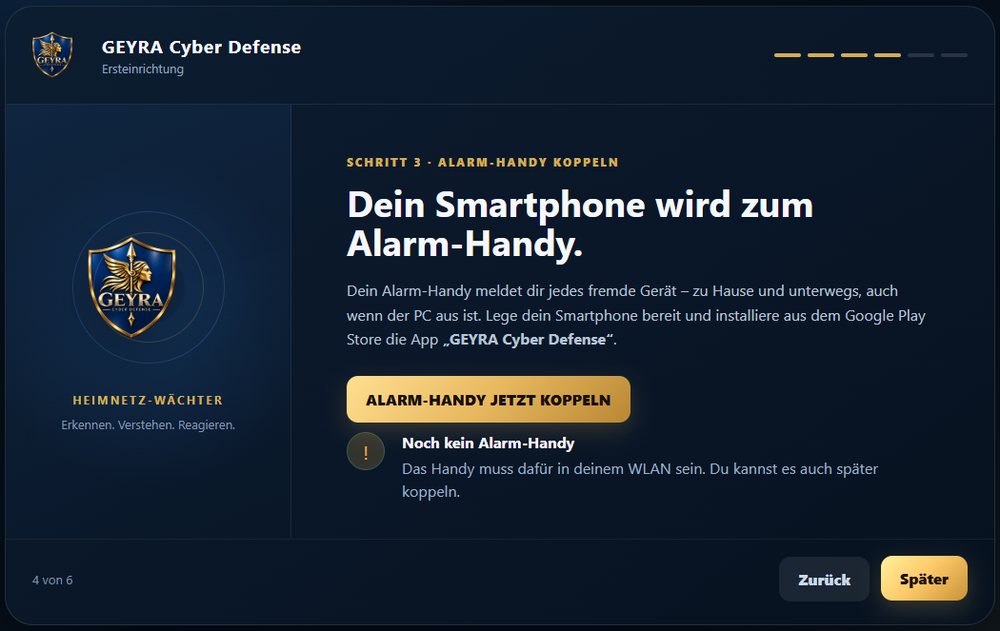
Step 3: pair alarm phone. Switch on protection
Choose Observe (GEYRA shows everything, does not intervene) or Protect (recommended: GEYRA warns on the alarm phone, and you block an unknown device on the PC). Both are free. Nothing is ever blocked without your consent.
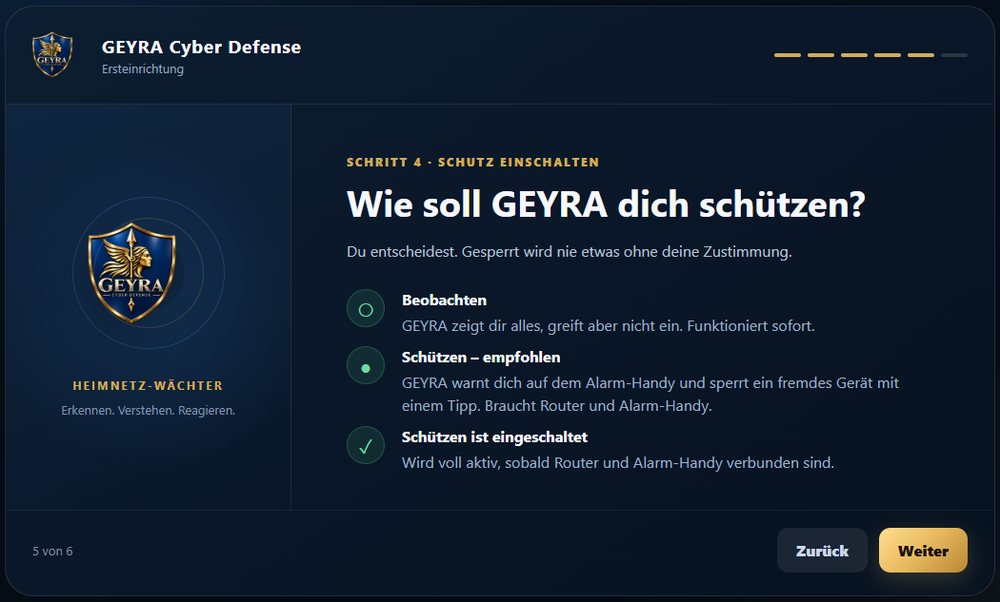
Step 4: switch on protection. Ready to go
Finally you see what is set up (✓) and what is still missing (!). Click OPEN GEYRA. Whatever is still missing is shown on the overview with the Next step button.
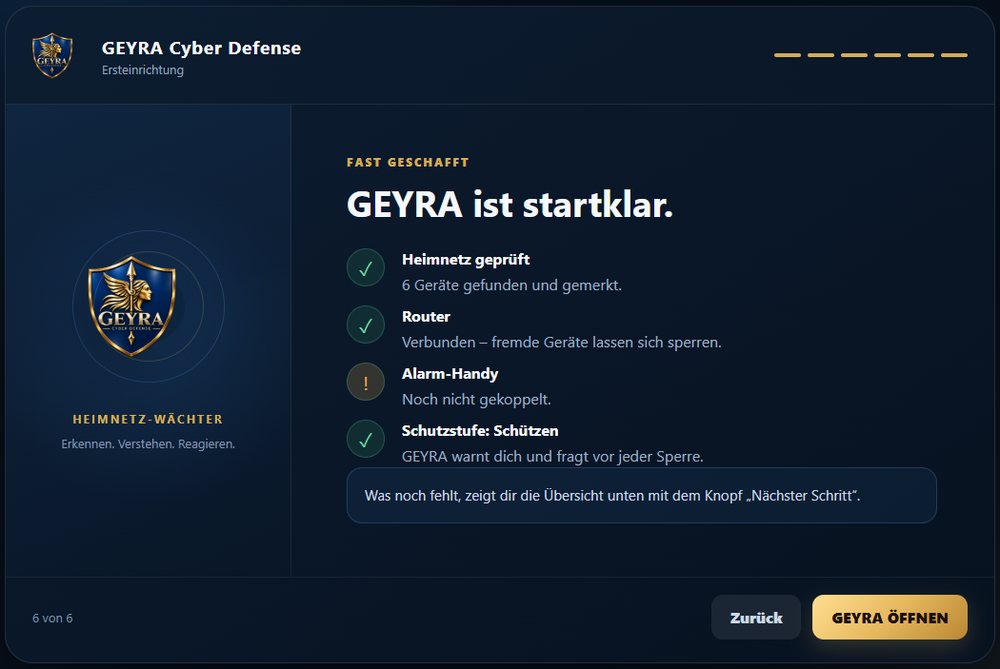
GEYRA is ready to go – with an overview of all items.
The overview
The start page shows your home network at a glance – and what is still to do.
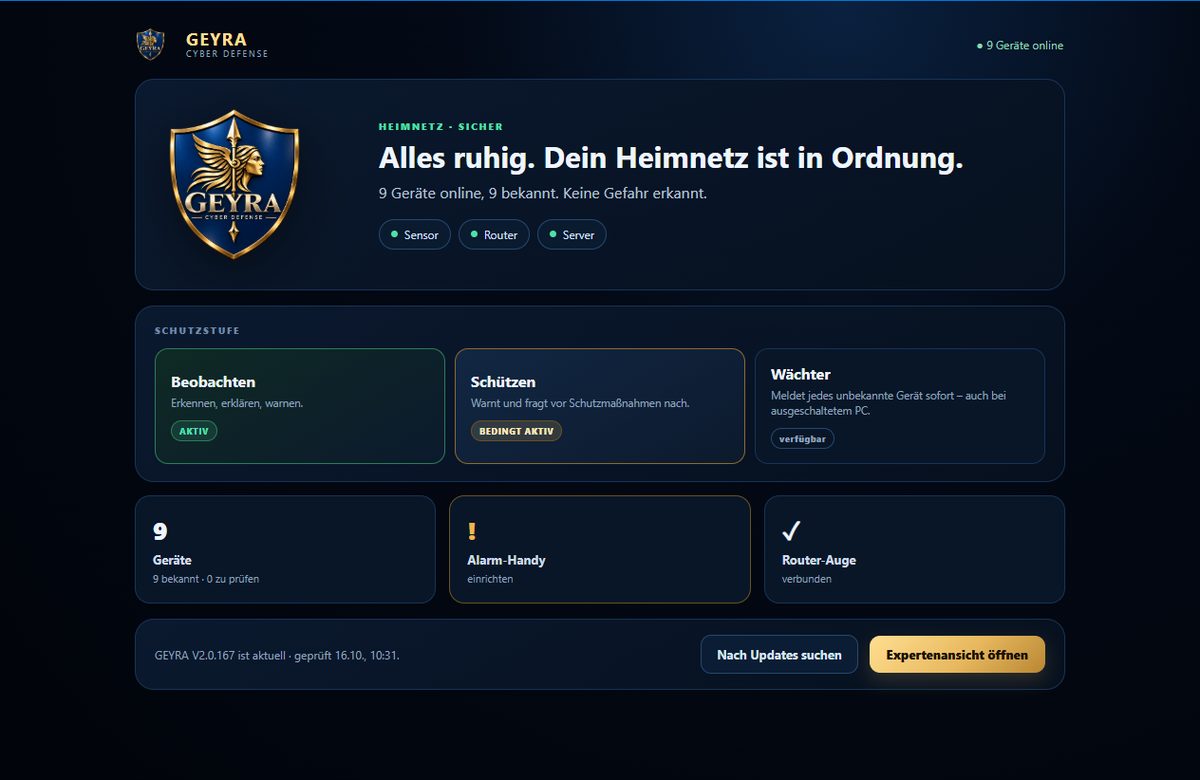
Top: status
“All quiet. Your home network is fine.” means: no danger detected. Below it shows how many devices are online and known. Right after starting it briefly shows “GEYRA is checking your home network …” – that is normal.
When there is an alarm
A red alarm appears at the top. With Check now you look at the device. With Seen you close the notice.
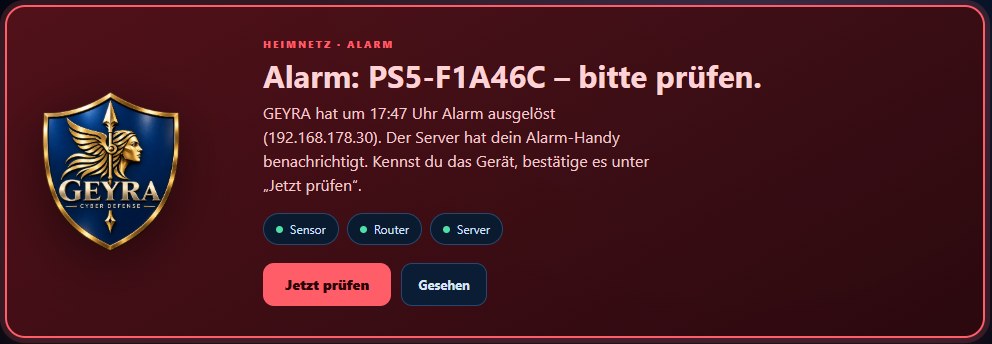
This is how GEYRA shows an alarm on the PC. Protection level
Here you see whether Observe, Protect or Guardian is active. PARTLY ACTIVE means: something is still missing, usually the alarm phone. More under Protection levels.
The three tiles – click them
- Devices – how many are known and how many you should still check.
- Alarm phone – if it says “! set up”, no phone is paired yet. One click starts the setup.
- Router eye – ✓ connected means: your router is connected to GEYRA.
Next step
If something is still missing, GEYRA shows a gold button at the bottom, for example Next step: pair alarm phone. Just click it. Open expert view shows all settings.
Confirm devices
At first GEYRA does not know your devices yet. Go through them once – then GEYRA will only report what is really new.
Open the device list
On the overview click the Devices tile, or in the expert view click Devices on the left.
Click a device
Start with the devices listed under “to check”. Click a device. Its device file opens.
Name and confirm
Under Your device name enter a name you recognise, for example “living room TV”, and choose the device type. Click Save device. The device is now confirmed.
What comes next
Optional: Guardian
The GEYRA server keeps watch even when your PC is off, and you block from your phone.
Open guide